Credit Scoring with Snowpark & LocalStack
4 minute read
Introduction
In this tutorial, you will learn how you can use the Snowflake emulator with Snowpark for Python and your favorite Python libraries for data analysis.
The Jupyter Notebook and the dataset used in this tutorial are available on GitHub.
Prerequisites
localstackCLI with aLOCALSTACK_AUTH_TOKEN- LocalStack for Snowflake
- Snowpark with other Python libraries
- Jupyter Notebook
You should also download credit_files.csv and credit_request.csv files from the LocalStack repository. The files should be present in the same directory as your Jupyter Notebook.
Start the Snowflake emulator
Start your LocalStack container in your preferred terminal/shell.
$ export LOCALSTACK_AUTH_TOKEN=<your_auth_token>
$ localstack start
Check the emulator’s availability by running:
$ localstack extensions list

┏━━━━━━━━━━━━━━━━━━━━━━━━━━━━━━┳━━━━━━━━━━━━━━━━━━━━━━━━━━━━━━━┳━━━━━━━━━┳━━━━━━━━━━━━┳━━━━━━━━━━━━━┓
┃ Name                         ┃ Summary                       ┃ Version ┃ Author     ┃ Plugin name ┃
┡━━━━━━━━━━━━━━━━━━━━━━━━━━━━━━╇━━━━━━━━━━━━━━━━━━━━━━━━━━━━━━━╇━━━━━━━━━╇━━━━━━━━━━━━╇━━━━━━━━━━━━━┩
│ localstack-extension-snowfl… │ LocalStack Extension:         │ 0.1.22  │ LocalStack │ snowflake   │
│                              │ Snowflake                     │         │            │             │
└──────────────────────────────┴───────────────────────────────┴─────────┴────────────┴─────────────┘
Create a Snowpark session
The next step is to configure the Snowflake emulator. The Snowflake emulator runs on snowflake.localhost.localstack.cloud. You can use the Snowpark to connect to the locally running Snowflake server.
Start Jupyter Notebook and create a new notebook. Add the following code to connect to the Snowflake emulator:
from snowflake.snowpark import *
from snowflake.snowpark.functions import *

connection_parameters = {
    "user": "test",
    "password": "test",
    "account": "test",
    "warehouse": "test",
    "host": "snowflake.localhost.localstack.cloud",
}

session = Session.builder.configs(connection_parameters).create()
In the above configuration, you can set user, password, account, and warehouse as test to avoid passing any production values. You can now run Snowflake SQL queries on your local machine.
session.sql("create or replace database credit_bank").collect()
session.sql("use schema credit_bank.public").collect()
print(session.sql("select current_warehouse(), current_database(), current_schema(), current_user(), current_role()").collect())
The following output is displayed:
[Row(?COLUMN?='TEST', CURRENT_DATABASE='CREDIT_BANK', CURRENT_SCHEMA='public', ?COLUMN?='TEST', GET_CURRENT_ROLE='PUBLIC')]
Create the tables
You can now create two tables associated with this tutorial:
CREDIT_FILES: This table contains the credit on files along with the credit standing whether the loan is being repaid or if there are actual issues with reimbursing the credit.CREDIT_REQUESTS: This table contains the new credit requests that the bank needs to provide approval on.
Run the following code to create the credit_df table:
import pandas as pd
credit_files = pd.read_csv('credit_files.csv')
session.write_pandas(credit_files,"CREDIT_FILES",auto_create_table='True')
credit_df = session.table("CREDIT_FILES")
credit_df.schema
The following output is displayed:
StructType([StructField('CREDIT_REQUEST_ID', LongType(), nullable=True), StructField('CREDIT_AMOUNT', LongType(), nullable=True), StructField('CREDIT_DURATION', LongType(), nullable=True), StructField('PURPOSE', StringType(), nullable=True), StructField('INSTALLMENT_COMMITMENT', LongType(), nullable=True), StructField('OTHER_PARTIES', StringType(), nullable=True), StructField('CREDIT_STANDING', StringType(), nullable=True), StructField('CREDIT_SCORE', LongType(), nullable=True), StructField('CHECKING_BALANCE', LongType(), nullable=True), StructField('SAVINGS_BALANCE', LongType(), nullable=True), StructField('EXISTING_CREDITS', LongType(), nullable=True), StructField('ASSETS', StringType(), nullable=True), StructField('HOUSING', StringType(), nullable=True), StructField('QUALIFICATION', StringType(), nullable=True), StructField('JOB_HISTORY', LongType(), nullable=True), StructField('AGE', LongType(), nullable=True), StructField('SEX', StringType(), nullable=True), StructField('MARITAL_STATUS', StringType(), nullable=True), StructField('NUM_DEPENDENTS', LongType(), nullable=True), StructField('RESIDENCE_SINCE', LongType(), nullable=True), StructField('OTHER_PAYMENT_PLANS', StringType(), nullable=True)])
In a similar fashion, you can create the credit_req_df table:
credit_requests = pd.read_csv('credit_request.csv')
session.write_pandas(credit_requests,"CREDIT_REQUESTS",auto_create_table='True')
credit_req_df = session.table("CREDIT_REQUESTS")
credit_req_df.schema
The following output is displayed:
StructType([StructField('CREDIT_REQUEST_ID', LongType(), nullable=True), StructField('CREDIT_AMOUNT', LongType(), nullable=True), StructField('CREDIT_DURATION', LongType(), nullable=True), StructField('PURPOSE', StringType(), nullable=True), StructField('INSTALLMENT_COMMITMENT', LongType(), nullable=True), StructField('OTHER_PARTIES', StringType(), nullable=True), StructField('CREDIT_SCORE', LongType(), nullable=True), StructField('CHECKING_BALANCE', LongType(), nullable=True), StructField('SAVINGS_BALANCE', LongType(), nullable=True), StructField('EXISTING_CREDITS', LongType(), nullable=True), StructField('ASSETS', StringType(), nullable=True), StructField('HOUSING', StringType(), nullable=True), StructField('QUALIFICATION', StringType(), nullable=True), StructField('JOB_HISTORY', LongType(), nullable=True), StructField('AGE', LongType(), nullable=True), StructField('SEX', StringType(), nullable=True), StructField('MARITAL_STATUS', StringType(), nullable=True), StructField('NUM_DEPENDENTS', LongType(), nullable=True), StructField('RESIDENCE_SINCE', LongType(), nullable=True), StructField('OTHER_PAYMENT_PLANS', StringType(), nullable=True)])
Analyze the data
You can now analyze the data using Snowpark and your favorite Python libraries. For example, you can fetch the first 5 rows of the credit_df table:
credit_df.toPandas().head()
You can similarly fetch the first 5 rows of the credit_req_df table:
credit_req_df.toPandas().head()
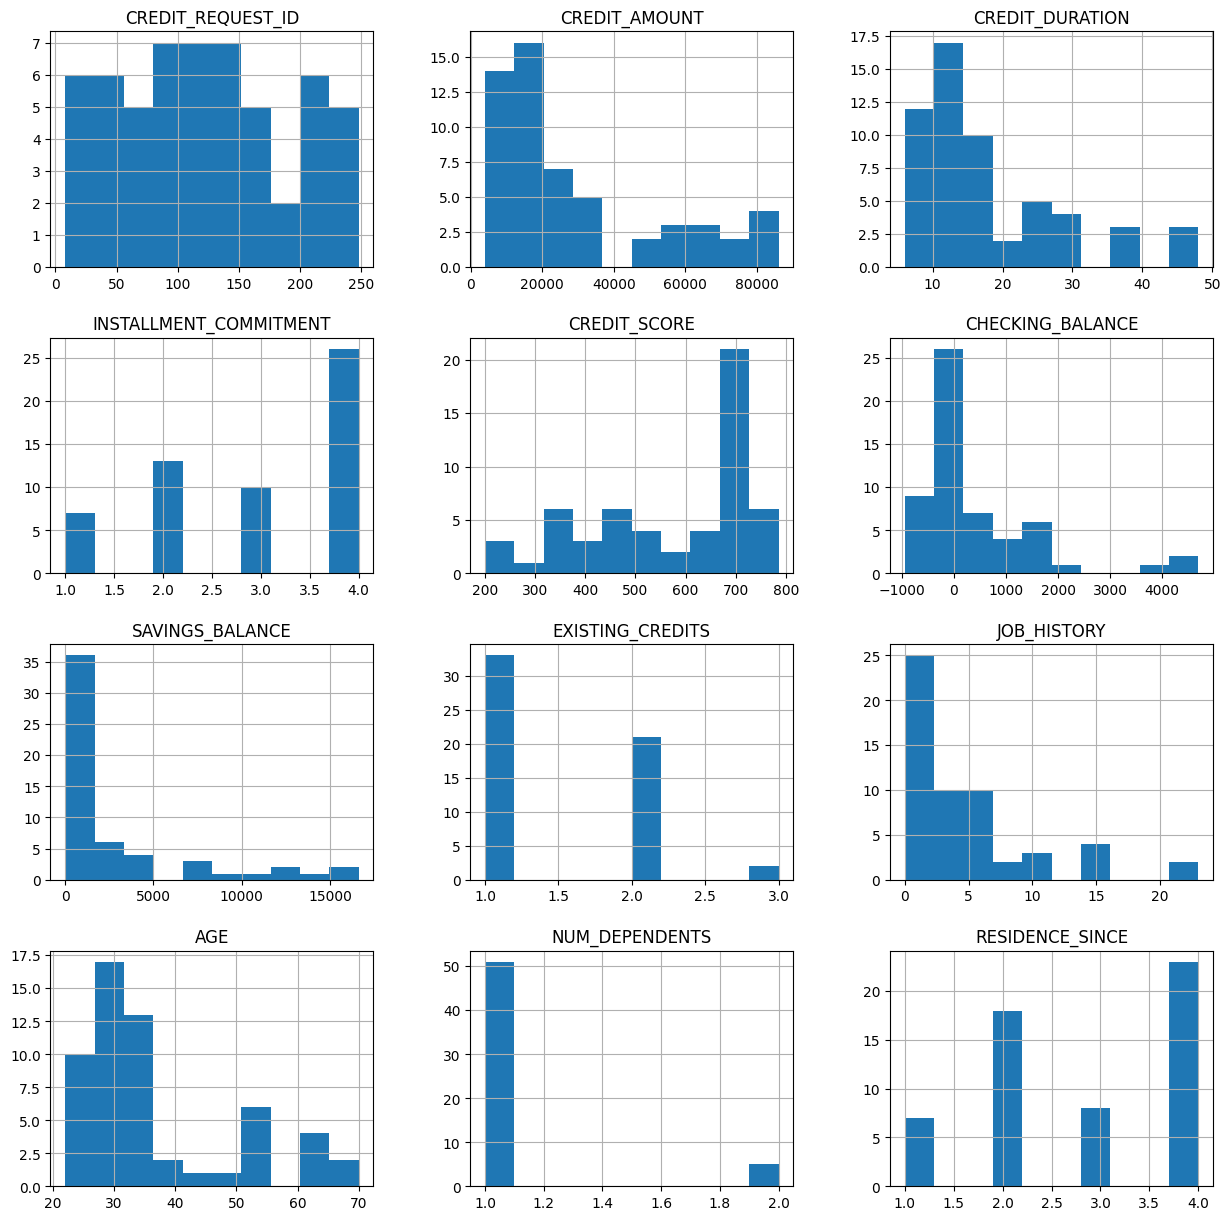
You can also visualize the numeric features and categorical features. For example, you can visualize the histogram of the credit_df table:
credit_df.toPandas().hist(figsize=(15,15))
The following output is displayed:
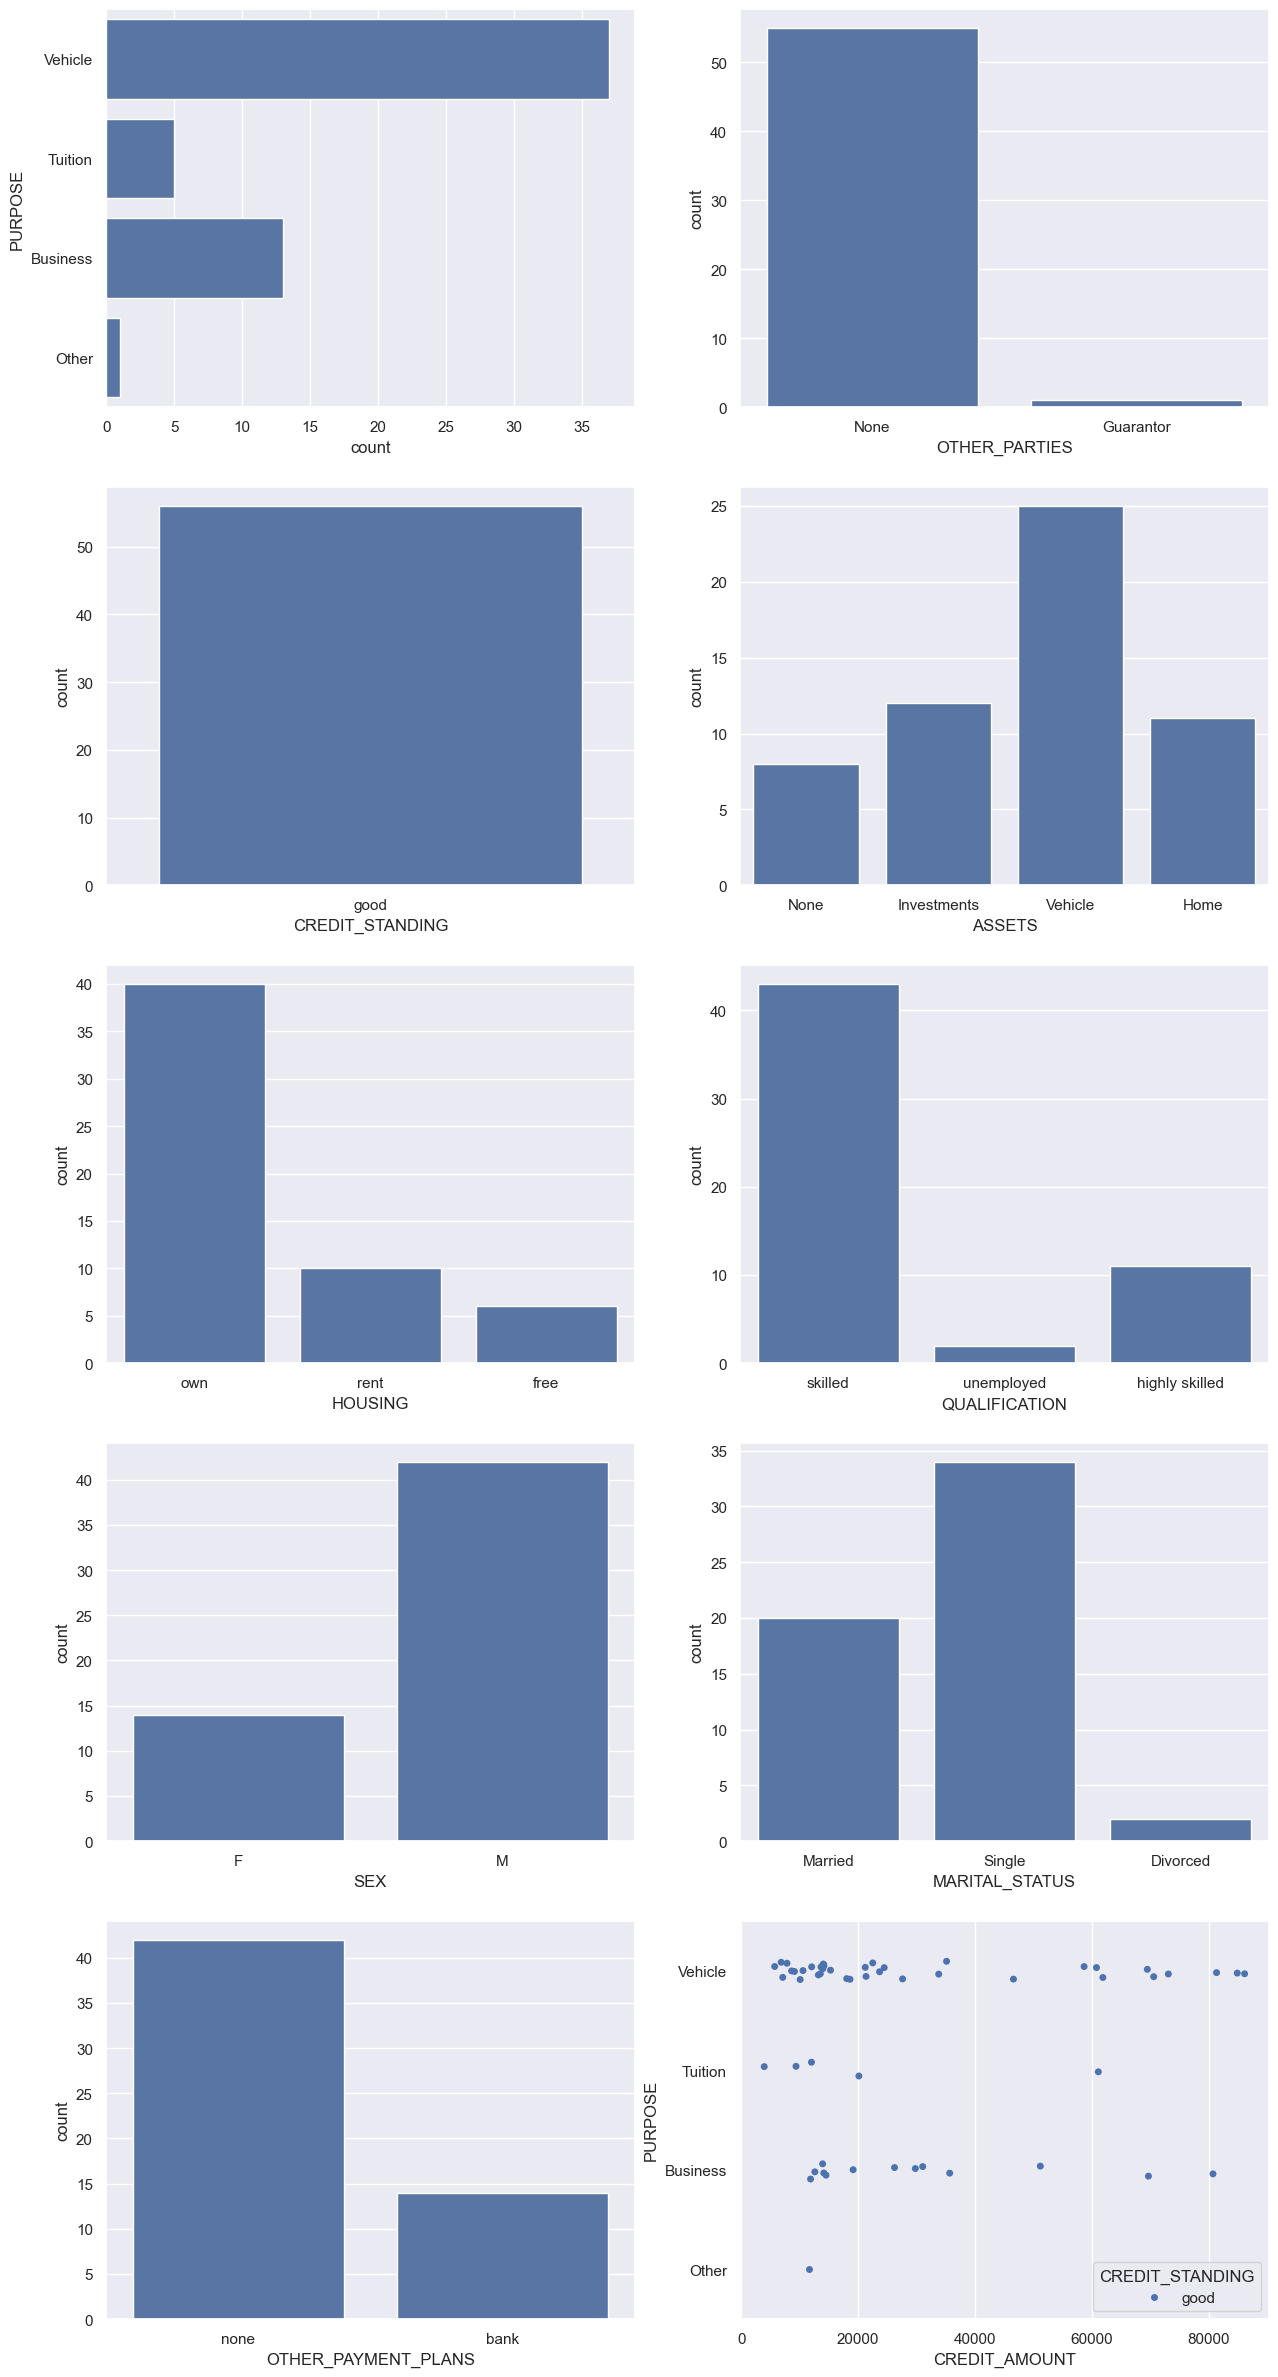
You can also visualize the categorical features of the credit_df table:
import matplotlib.pyplot as plt
import seaborn as sns

sns.set(style="darkgrid")

fig, axs = plt.subplots(5, 2, figsize=(15, 30))
df = credit_df.toPandas()
sns.countplot(data=df, y="PURPOSE", ax=axs[0,0])
sns.countplot(data=df, x="OTHER_PARTIES", ax=axs[0,1])
sns.countplot(data=df, x="CREDIT_STANDING", ax=axs[1,0])
sns.countplot(data=df, x="ASSETS", ax=axs[1,1])
sns.countplot(data=df, x="HOUSING", ax=axs[2,0])
sns.countplot(data=df, x="QUALIFICATION", ax=axs[2,1])
sns.countplot(data=df, x="SEX", ax=axs[3,0])
sns.countplot(data=df, x="MARITAL_STATUS", ax=axs[3,1])
sns.countplot(data=df, x="OTHER_PAYMENT_PLANS", ax=axs[4,0])
sns.stripplot(y="PURPOSE", x="CREDIT_AMOUNT", data=df, hue='CREDIT_STANDING', jitter=True, ax=axs[4,1])
plt.show()
The following output is displayed:
Conclusion
You can now perform further experimentations with the Snowflake emulator. For example, you can use the Snowpark API to run queries to get various insights, such as determining the range of loans per different category.